Floristry Lessons delivered Digitally
Date Published: 20/10/2020 | Blog category: Southern
Sharon McKinder, our Floristry Tutor, is delivering on-line classes to her students on a weekly basis for next 10 weeks.
Sharon uses photographs alongside her tutorials and offers a step by step guide to support the teaching.
You will need
1 bunch of gladioli. 5 stems
1 mixed bunch of 3 chrysanthemum blooms, 3 stocks, 1 cabbage stem, 1 lily
Both the above came to £10 from Co-op
1/2 block oasis, tape, square container or similar
Various greenery of your choice
Optional
1 stem sedum
Fruit and cocktail sticks
Bow or hessian
Step 1. Picture 1
Soak oasis and tape securely into dish (as your not travelling with the finished product you may not need to tape in)
We are creating an arrangement which is taller to the back left hand side of the oasis and longer on the front right hand side as low as the table top
Use darker greenery to outline the arrangement.
Step2. Picture 2
Fill in the middle of the oasis with a lighter greenery but remember not to overfill
Step 3. Picture 3
Add the gladioli
The first one nice and tall. Placed in the back left hand corner of the oasis top
The second one right hand side front corner of the oasis so it’s resting in the table top
The third cut into 2 Placed right hand side back corner on oasis top and the remaining piece front left corner, low
Remaining two ( it may be necessary to snip the tops out of the flowers) place left and right at the back, low as a skirt touching the table top
Any spare, Place anywhere keeping within shape created
Step 4. Picture 4
Add all the stocks, slightly staggered in length, to the right side of the top gladioli
Step 5. Picture 5
Place in the 3 chrysanthemum blooms. Start with the tallest towards the left. Then the centre focal point. Lastly the front right nice and low. Try to equally spread them the same distance apart
Step 6. Picture 6
Cut the cabbage flower quite short and place on the left hand side making sure it’s facing left and not facing forward
Step 7. Picture 7
Cut the lily complete as place on the right hand side remembering to leave enough room for it to open
Step 8. Picture 8
If you have sedum, cut into sections and spread, low throughout to give depth to the arrangement
Step 9. Picture 9
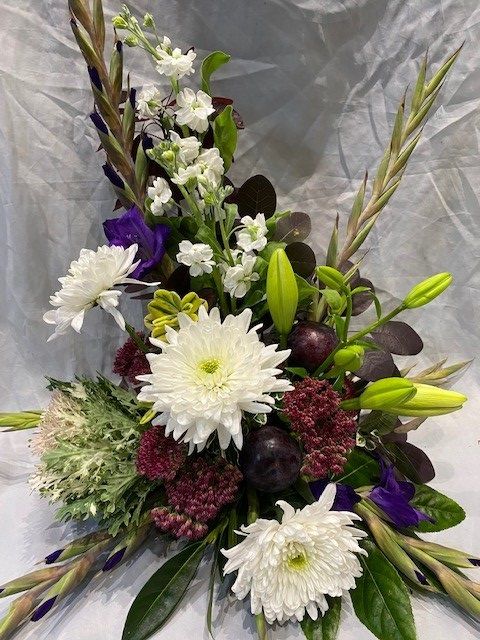
If you haven’t any sedum use either different greenery or fruit on cocktail sticks as a filler
You may also use hessian, ribbon or wheat.
The photograph shows Step 9 and here is what Mandy, one of Sharon's students, had to say:-
"I had to adapt and use different colours and flowers. I have enjoyed working with the flowers and photos so much. Looking forward to the next design".
We are really pleased that both our tutors and students are embracing the new world and although we appreciate the importance of the social aspect, we are equally pleased that they have been able to adapt and continue through these uncertain times. We look forward to all our courses reconvening as soon as it is safe to do so.